
Photos for a rental listing: what to show
September 9, 2026 · By Smarter Facility
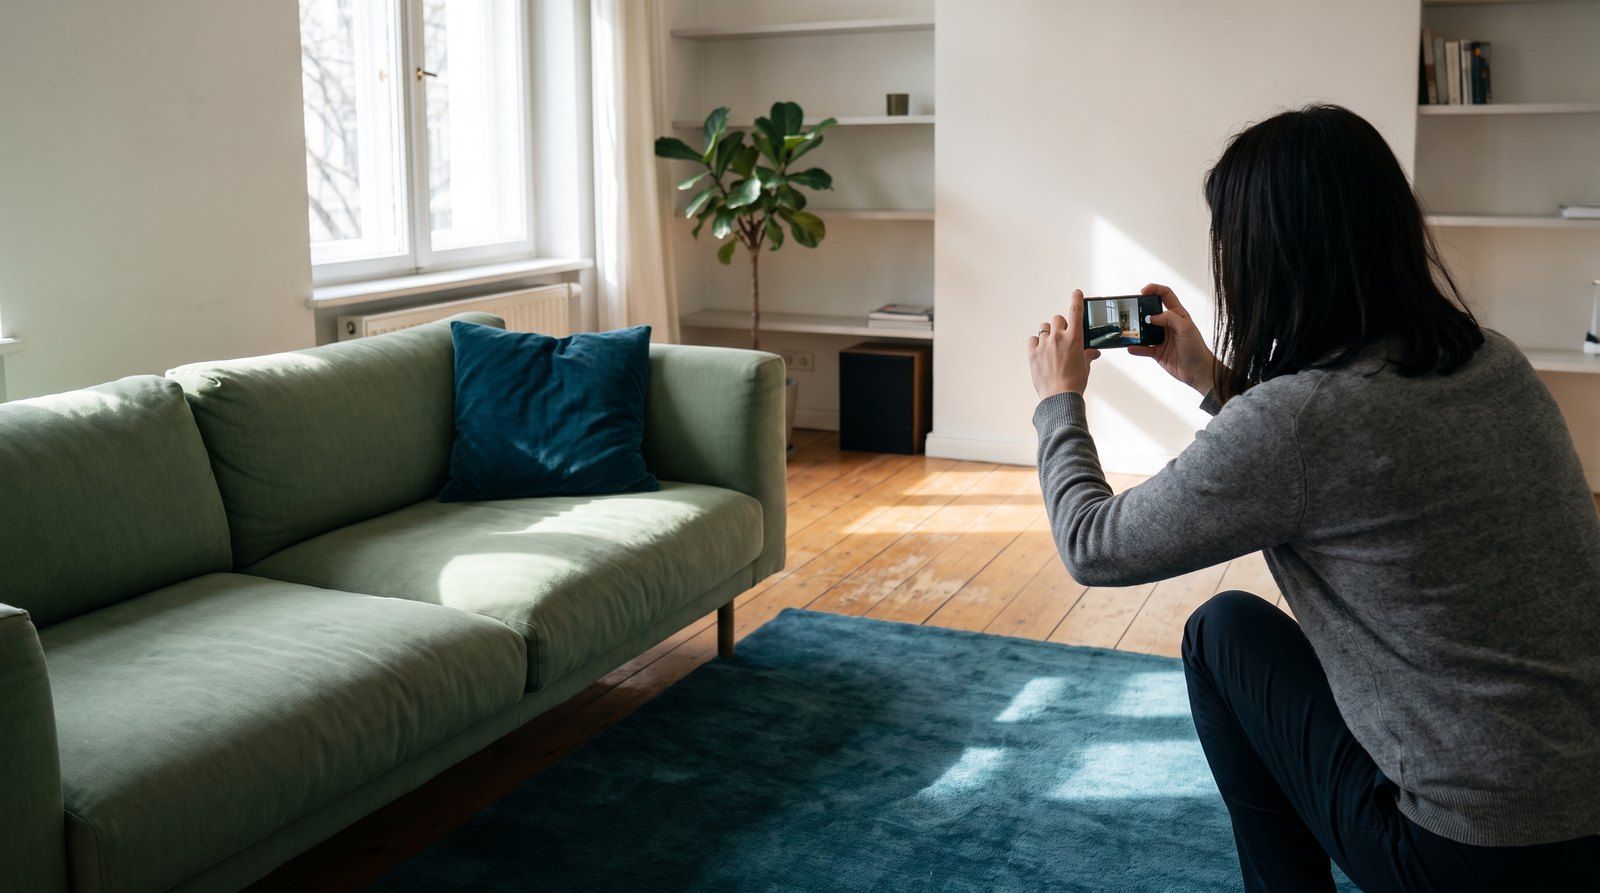
Which eight photos a rental listing needs, which one to put first, how to shoot each room with a phone, and how to show a small or dark room without misleading the tenant.
A rental listing needs eight photos. The two owners skip most often, the bathroom and the kitchen counter, are exactly the ones that make a tenant decide the place is not worth a call. Every photo in the set answers a question you would otherwise field on the phone, or never hear at all because the person simply did not call. Shoot with that in mind and you get fewer enquiries, but more serious ones.
Which photos a rental listing needs
A listing needs eight photos: the main room, the kitchen counter, every bedroom, the whole bathroom, the entrance hall, the storage, the balcony or the view, and the entrance to the building.
Work through them in that order and you will not have to come back a second time. The main room shows the size. The counter, shot along its length rather than head on, shows how much cooking space there is and whether there is an oven. That is the second question from every tenant who cooks. Every bedroom gets its own photo, taken from the corner towards the door, because two people who are going to share the flat want to compare the rooms before they decide who pays what.
The bathroom is the photo owners skip and the photo that gets a listing dropped. Shoot all of it, from the doorway, so that the shower or the bath, the sink, and whether there is a washing machine and where it stands are all visible. A listing with no bathroom photo reads as a listing where something is wrong with the bathroom.
The last three are quick. The entrance hall shows whether there is anywhere to leave shoes and coats. The storage, whether it is a wardrobe, a basement or an alcove, answers where a year of belongings goes. The entrance and the street in front of it show what the tenant will be walking into at eleven at night, and if you leave them out the question comes anyway.
Two more photos are worth taking when there is something to take: the heating, whether that is an air conditioner, a radiator or a stove, and the balcony with whatever actually fits on it. If the property has neither, do not invent a substitute shot. Eight to twelve photos of real rooms do more than twenty of which four are the same corner.
The photos answer what the property looks like. The listing text answers everything else, and the two have to agree. If you have not got as far as the listing yet, see how to rent out an apartment step by step.
Which photo goes first
Put the largest furnished room first, shot from the darkest corner towards the window, because that shows the size and the light at once, the two things a tenant checks first.
That single frame decides whether anyone opens the listing at all. From the dark corner towards the window the room presents its full depth to the lens and the daylight sits at the back of the frame. The room looks bigger than it does in a shot taken from the window inwards, which flattens it against the wall.
Two common choices fail here. The outside of the building says nothing the address does not, and on a prefab block it costs you the click outright. An empty entrance hall is worse still, because it is the least informative square metre in the property. Both belong in the set, but neither goes first.
There is one case where first place goes to another photo. If the flat has a view that is unusual for its price bracket, the sea, the mountain, an open park instead of the block across the street, that goes first and the main room becomes second. If you have to argue with yourself about whether the view counts, it does not.
How to shoot the rooms with a phone, step by step
Shoot every room from a corner, holding the phone horizontally at chest height with the back wall straight, in daylight, with the lights on and the flash off.
The same six steps work in every room:
- Turn on the light. Open the curtains and blinds all the way and switch on every lamp in the room. Mixing daylight and lamps is a compromise, but in a flat with one window per room the extra light usually wins.
- Clear the frame before you lift the phone. Put away the drying rack, the bin, the charging cables and the shoes. Wipe the mirror and the taps in the bathroom, because at this size every smear shows. Preparing the property is a separate job and it pays off twice, once in the photos and once at the viewing.
- Stand in the right corner. Pick the one the longest line through the room runs from, usually diagonally opposite the window.
- Hold the phone horizontally, at chest height, no higher and no lower. From above the room turns into a floor plan; from below the ceiling comes down on it.
- Straighten the back wall. Tilt the phone until the wall stands vertical in the frame. Turn on the camera grid in the settings and use it. A leaning wall is the clearest sign of an amateur photo and it costs nothing to fix.
- Take three frames of every room from slightly different positions, then pick the sharpest and the straightest one on a big screen, not on the phone.
Switch the flash off before you start and leave it off. The built in flash flattens the room, blows out the wall closest to you and turns a warm room cold. If a room is too dark without it, the problem is the hour, not the lighting, and the next section deals with exactly that.
How to show a small or dark room without misleading anyone
Shoot a small room from the doorway with the door open, and a dark room at the hour when it gets the most daylight, instead of widening the lens or pushing up the exposure.
The doorway is the only position in a small room that gives the camera enough distance, and nothing stops you stepping half a pace back into the hall. If the room faces north or sits on the ground floor, watch it for a day and note when it is brightest. That depends on the orientation and on the building opposite, so no general rule will help you. Shoot it then, instead of fighting the camera at six in the evening.
Both shortcuts have a price and it is paid at the viewing. Ultra wide lenses stretch the room at the edges and add width that does not exist, and the tenant notices before crossing the threshold. A brightened photo does the same with the light. What you lose is not the viewing but the tenant: someone who came for a promise made by a photo leaves annoyed, and the search starts over.
The rule is short. A room the photo flatters is a viewing that ends badly.
What not to photograph, and how to show wear
People, personal documents, family photos, the neighbours' property and anything that gives away the exact entrance all stay out of the frame, while wear goes into a photo rather than being hidden and then explained at the viewing.
The list of what to keep out is short and every item has a reason:
- No people, including the current tenant and your own family.
- No documents, post or bills, nothing with a name and an address on it. It usually turns up in the frame on the kitchen table.
- No family photos on the walls and shelves, because they show who lives there to everyone who opens the listing.
- Nothing showing a neighbour's door, balcony or car, since that is someone else's property.
- Nothing that identifies the exact flat: the door number, the intercom label, the letterbox.
With wear it is the other way round. Photograph the worn parquet, the old water heater, the cramped kitchen, the bathroom that has not been redone. A tenant who saw the parquet in the listing and came anyway has already made their mind up about the parquet. A tenant who finds it at the viewing has made their mind up about you.
Hence the rule: if something shows up in the first minute of a viewing, it belongs in the photos. If it shows up in the first week, it belongs in the listing text. That covers the working but ageing water heater, the window onto a blank wall and the neighbours' dog. None of them stops the property being let. Finding them at the viewing does.
Empty, furnished or with a tenant still in: when to shoot
Shoot it furnished if it is let furnished, empty if it is let unfurnished, and never around the belongings of a tenant who still lives there without written consent and an agreed time.
The photos have to show what the tenant gets. An empty photo of a furnished flat hides the one thing the person most wants to see, namely the furniture. A furnished photo of a property you are clearing out is a promise you will be explaining later. If you let it unfurnished, shoot it empty and clean, and accept that empty rooms look smaller. That is honest, and the room sizes in the text make up for it.
With a tenant still in, the rules change. Ask for consent in writing, agree a time, and photograph the property, not their things. Personal belongings in the frame help nobody: the current tenant is exposed and the next one sees nothing through the clutter. If they say no, wait until the flat is empty and use the old set, noting that in the listing text.
Reshoot when one of four things happens: the furniture changes, work is done on the flat, the season through the window no longer matches the season you are letting in, or the set has already served more than one letting. A photo set does not last forever, and a summer balcony in a January listing reads as carelessness rather than bad luck.
An up to date photo set is worth keeping where everything else about the property already is, rather than scattered between a phone and two emails. In Smarter Facility for owners every property is a separate profile you upload and store its documents and photos in, so the next reshoot starts with a clear picture of what you already have.
Frequently asked questions
- Should you edit the photos before you upload them?
- Only lightly. Straighten a crooked photo, nudge the brightness or the contrast. That is normal. Remove objects, swap the sky or add furniture that is not there and you are buying a viewing you will then lose, while the tenant now expects you to mislead them about something else too.
- Can you use old photos from a previous letting?
- Yes, if nothing has changed in the meantime. Check the furniture, the appliances, the colour of the walls and what is visible through the window. If work has been done or the furniture has changed, shoot again. The same goes for photos that show a different season from the one you are letting in. Old photos of a changed flat lead to cancelled viewings.
- Should you photograph the stairwell, the lift and the common parts?
- Skip them unless they have recently been renovated, in which case one photo is enough. A worn stairwell shot in detail costs you enquiries without telling the tenant anything they will not see on the way up. Never photograph a neighbour's door, car or balcony, because that is someone else's property.
- Is it worth hiring a professional photographer for a single property?
- Usually not for a standard flat let at the market rate, where a carefully taken phone set does the same job. It is worth it in two cases: an expensive property whose listing competes on presentation, and a flat you let repeatedly and can shoot once for several lettings in a row.
- Can video or a panoramic photo replace the photos?
- No. Video and a virtual tour are a useful addition, especially for a tenant moving from another city. But the thumbnail someone scrolls past while going through listings is a still photo, and so is everything that gets compared between two listings. Take the eight photos first and add the video afterwards if you want to.